
← Help · Seller: Business Suite
Make and Print a Product Label
Input required product parameters, verify required statements, and generate the final Product Label at your specified dimensions.
- 1
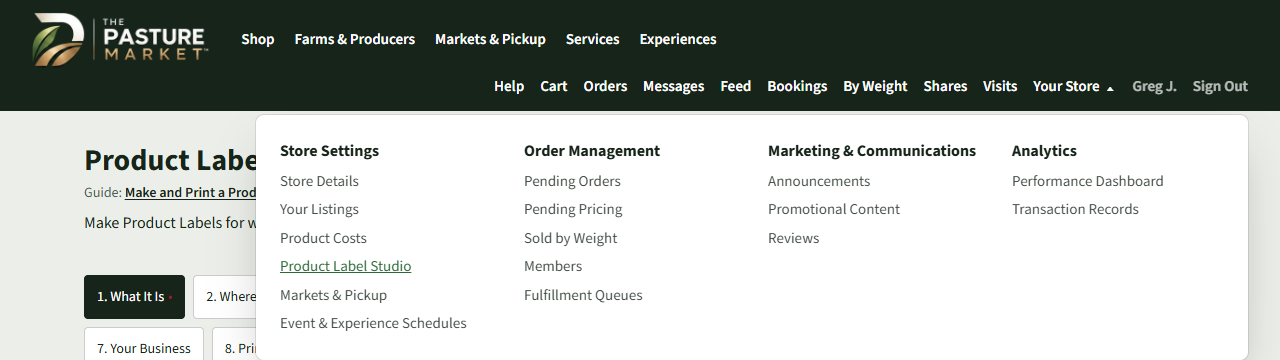
Open Your Store ▾ and, under Store Settings, choose Product Label Studio.
- 2
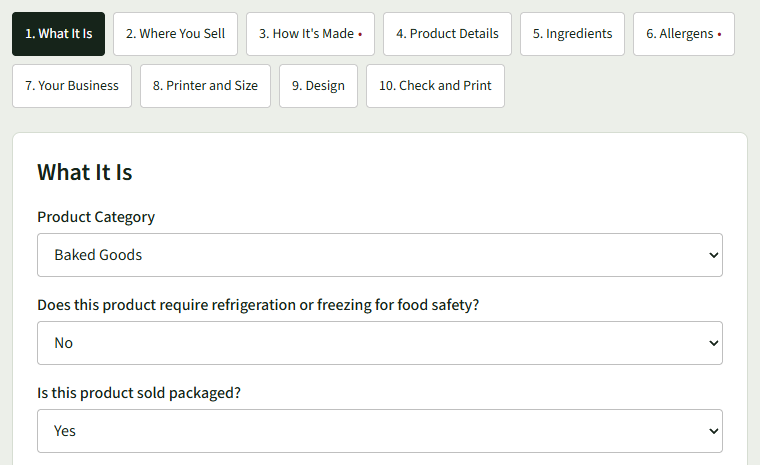
Complete the ten sequential modules, utilizing the Next control to advance. A red status indicator adjacent to a module denotes pending required input.
- 3
In What It Is, choose the Product Category and answer its questions. In Where You Sell, choose the State Being Sold From and each Sales Channel you use. In How It's Made, choose the Production Method.
- 4
In Product Details, enter the Product Name, the Net Quantity and any other detail the step asks for.
- 5
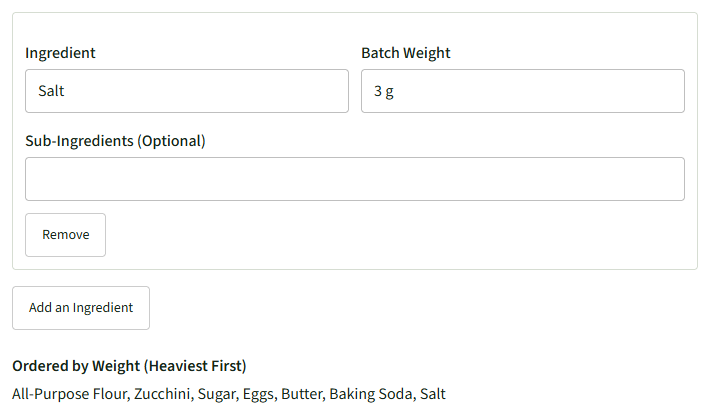
In Ingredients, enter each Ingredient with its Batch Weight for one batch, in grams, ounces or pounds. Choose Add an Ingredient for each one; the system automatically sorts and displays them by descending weight.
- 6
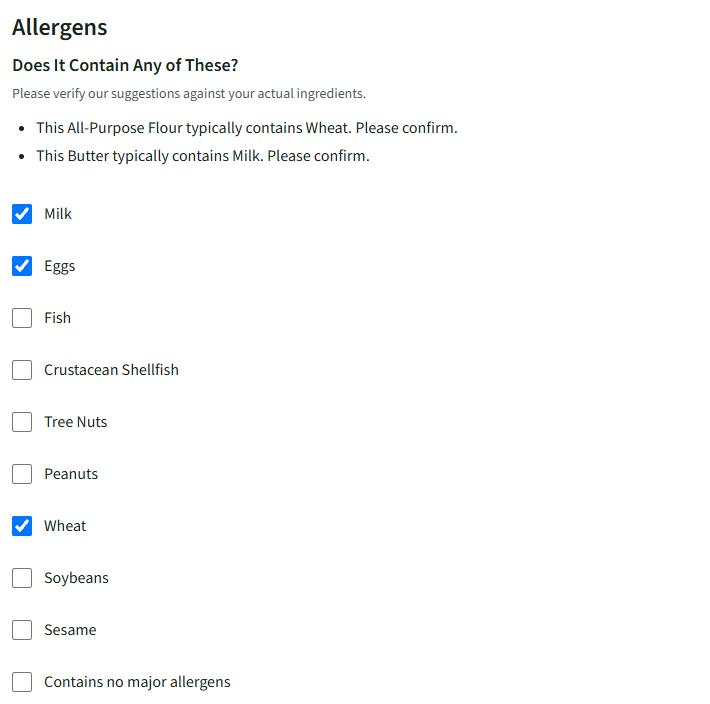
Within the Allergens configuration, explicitly toggle all applicable major allergens or select the Contains no major allergens declaration. System-generated allergen flags are predictive; you must manually verify and confirm all allergens based on your exact ingredient profile.
- 7
Within the Your Business module, verify the auto-populated Business Name and Business Address data. Modifications executed here are scoped exclusively to the current Product Label instance.
- 8
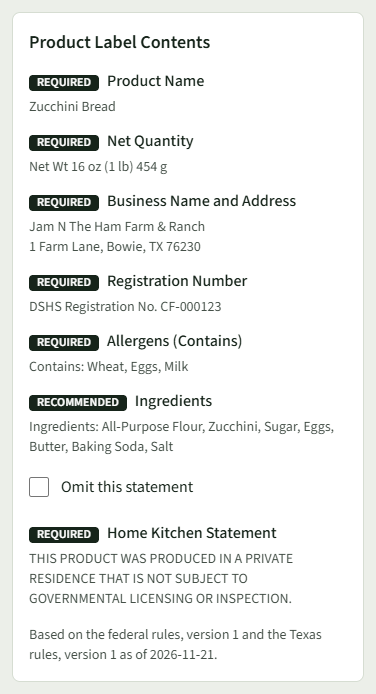
Product Label Contents, beside the steps on a computer and below them on a phone, enumerates all algorithmically determined statements (designated as Required or Recommended), dynamically populated with your configuration data. For any statement requiring further configuration, the Edit action redirects directly to the corresponding input module.
- 9
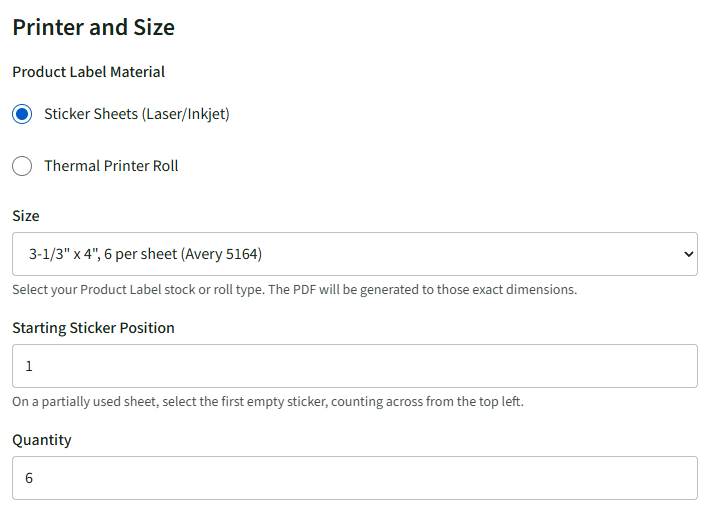
In Printer and Size, choose the Product Label Material, Sticker Sheets (Laser/Inkjet) or Thermal Printer Roll, then the Size of your sticker sheet or roll and the Quantity. For partially depleted physical media, specify the Starting Sticker Position to calibrate the starting offset.
- 10
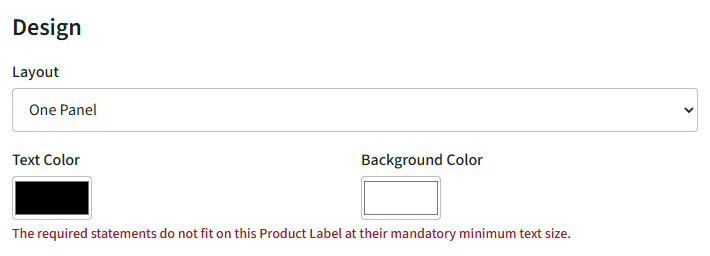
In Design, choose the Layout, One Panel or Front and Side, and add your own text, a QR code to your store or a logo under Custom Elements. The layout engine automatically prevents custom elements from overlapping required statements.
- 11
If the page says The required statements do not fit on this Product Label at their mandatory minimum text size., choose a larger Size in Printer and Size, or One Panel under Layout. PDF generation is disabled until all mandatory statements fit within the selected Product Label dimensions.
- 12
The validation module confirms completeness (displaying All Required Statements Are Included) or itemizes missing dependencies alongside a direct Edit remediation link.

- 13
Prior to executing on physical sticker media, utilize the Print a Test Sheet diagnostic function on standard paper to verify alignment. Verify alignment against your physical sticker stock. Use the calibration offsets (Move Everything Up / Down / Left / Right) in the Printer and Size configuration to correct any deviation.
- 14
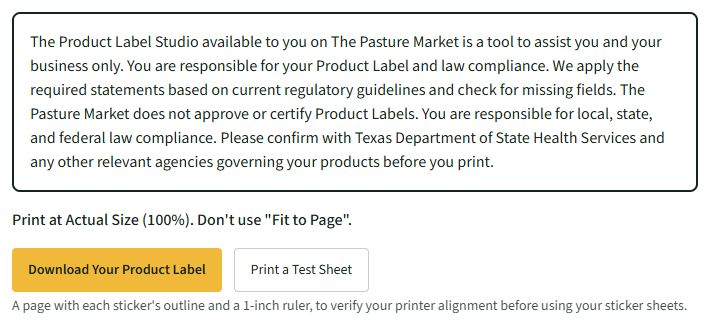
Acknowledge the pre-generation liability advisories, then execute the Download Your Product Label action. The generated PDF strictly adheres to your configured dimensions. Printer settings must be locked to Actual Size (100%); utilizing Fit to Page scaling will void layout integrity.
Good to Know
The Product Label Studio functions exclusively as a business enablement utility. Sellers retain sole liability for Product Label accuracy and regulatory compliance; The Pasture Market does not approve or certify Product Labels. Sellers must verify compliance with relevant regulatory agencies prior to physical execution. Draft data is stored locally in this browser; cross-device syncing is not supported.